Plesk ClamAV Installation: 7 Steps to Enhanced Email Security

ClamAV: Open-Source Antivirus Benefits
ClamAV is an open-source antivirus engine designed to detect various types of malicious software, including viruses, malware, and spyware.
Plesk ClamAV Installation: Enhancing Email Security
In this comprehensive guide, we will leverage the capabilities of ClamAV as a viable alternative to Plesk Premium Antivirus, entrusting ClamAV with the crucial task of scanning both incoming and outgoing mail for potential threats.
The steps detailed in this tutorial have been meticulously tested on a dedicated server powered by Ubuntu. Rest assured, this guide aims to provide a seamless transition for users seeking an effective solution for email security. However, should you encounter any challenges or have queries during the implementation process, please feel free to reach out for prompt and personalized assistance. Your success in implementing ClamAV is our priority, and we are committed to ensuring a smooth experience for every user.
To kick off the process, let’s install the required packages for our project in the terminal on the Plesk server:
sudo apt-get install clamav clamav-base clamav-daemon clamav-freshclam clamav-milter clamsmtp -y
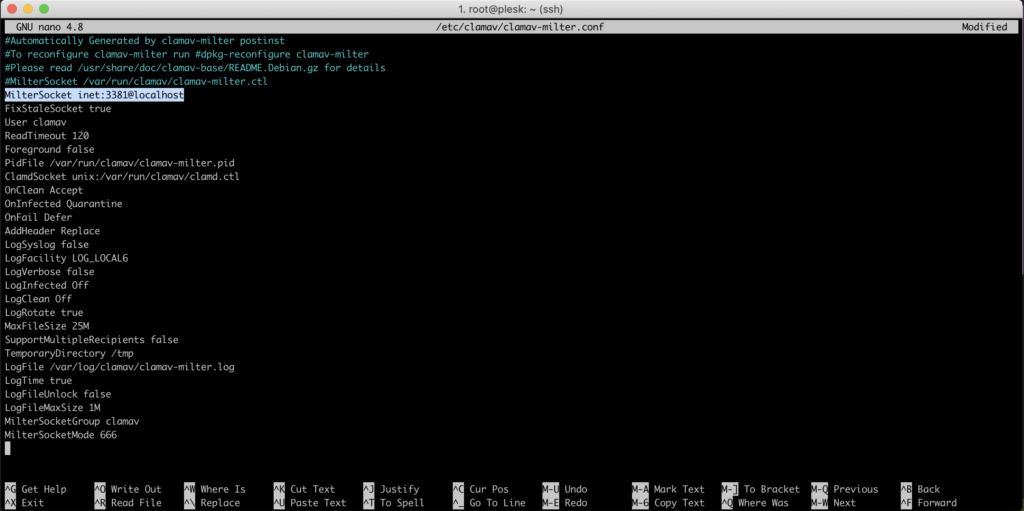
Commend the MilterSocket line ( #MilterSocket /var/run/clamav/clamav-milter.ctl )in the /etc/clamav/clamav-milter.conf file and add the line provided below:
MilterSocket inet:3381@localhost
To enhance your file access experience and facilitate seamless editing, I recommend leveraging the nano editor. To do so, initiate the process by executing the command ‘sudo nano /your/path‘ in the terminal. Once the nano editor is open, proceed with making your desired edits. Upon completion, finalize the editing process by pressing CTRL+X to exit, followed by confirming your decision with CTRL+C.
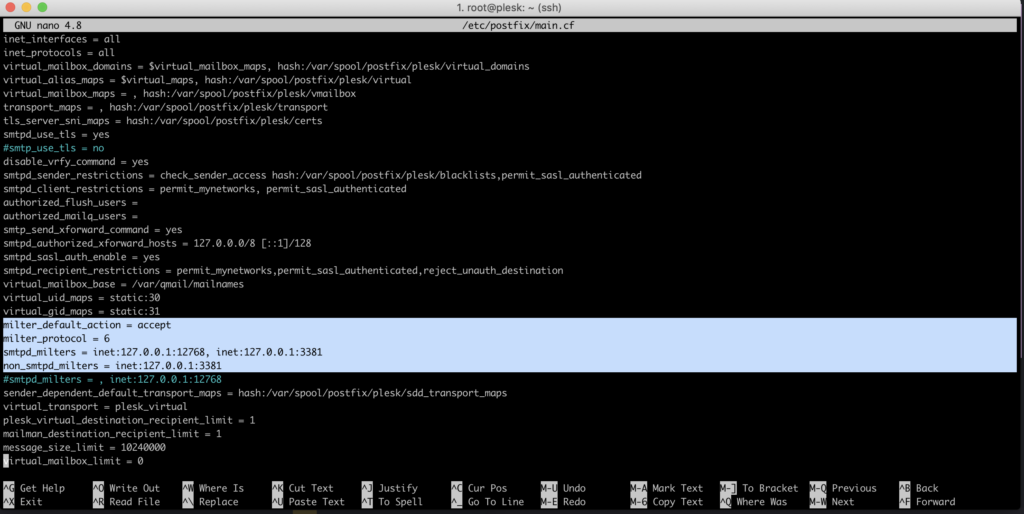
Moving on, navigate to the /etc/postfix/main.cf file. Introduce the following lines above the directive beginning with smtpd_milters. Remove the existing smtpd_milters line or you can comment and add this:
milter_default_action = acceptmilter_protocol = 6smtpd_milters = inet:127.0.0.1:12768, inet:127.0.0.1:3381non_smtpd_milters = inet:127.0.0.1:3381
Then you can check the file /etc/clamsmtpd.conf to verify whether a tag has been appended to the mail header. To accomplish this, we just need to eliminate the hash symbol at the beginning of the following line:
Header: X-AV-Checked: ClamAV using ClamSMTP
Alrighty then, we initiate the restart of the listed services, after which ClamAV is set to perform a scan on freshly arriving emails:
sudo systemctl restart postfixsudo systemctl restart clamav-milter.servicesudo systemctl restart clamav-daemon.service
Now, whether you have received an email or are sending a new one, the following entries should be present in the mail header:
X-Virus-Scanned: clamav-milter 0.103.8 at your.serverhost.nameX-Virus-Status: Clean
If you encounter an error where you are unable to send or receive an email, simply restart the service again, and it should function properly as if it were new!
To ensure that the services initiate automatic operation upon restarting the server, I suggest inputting the following commands in the command line:
sudo systemctl enable clamav-milter.service sudo systemctl enable clamav-daemon.service
Conclusion
As we wrap up this guide on Plesk ClamAV installation, you now possess a powerful tool to enhance your email security. Tested rigorously on my dedicated Ubuntu server, this tutorial aims to guide you seamlessly through the integration of ClamAV.
Your success is my priority. I’ve provided detailed steps for package installation, insights on optimizing file access, and key configurations. Anticipating challenges, I’m here to offer personalized assistance for a smooth experience.
Recapping, we covered package installation, file edits, and service restarts to activate ClamAV scanning. Appended mail headers now reflect successful scans, ensuring heightened security for your emails.
In case of errors, a simple service restart should resolve issues. To fortify your system, consider enabling automatic operation upon server restart.
As we conclude, trust in your ability to implement ClamAV successfully. You’ve got a robust email security solution at your fingertips. For any queries, I’m here to help.


Thank you so much!
The first tutorial that works. Great job!!
Whar about update freshclam for virus definitions? Does it work automaticly or is a cron job needed?
Thank you!
I’m glad this works for you. For the virus definition update, it’s advised that you use a cron job for the update. 😀
Thanks for answering. I’ve checked the log files today. There is no need for a cron job, freshclam is configured by default to update the definitions hourly. That’s really nice.